Lexus ES manuals

Lexus ES: Components

COMPONENTS

ILLUSTRATION

*1

COURTESY LIGHT ASSEMBLY

*2

REAR DOOR TRIM BOARD SUB-ASSEMBLY

*3

REAR DOOR UPPER TRIM PAD

*4

REAR POWER WINDOW REGULATOR SWITCH ASSEMBLY WITH REAR DOOR UPPER ARMREST BASE PANEL

ILLUSTRATION

*A

w/ Rear Door Sunshade

-

-

*1

REAR DOOR GLASS RUN

*2

REAR DOOR GLASS SUB-ASSEMBLY

*3

REAR DOOR NO. 2 SERVICE HOLE COVER

*4

REAR DOOR NO. 2 VENT SEAL

*5

REAR DOOR PANEL PROTECTOR

*6

REAR DOOR QUARTER WINDOW GLASS SUB-ASSEMBLY

*7

REAR DOOR SERVICE HOLE COVER

*8

REAR DOOR WEATHERSTRIP

*9

REAR DOOR WINDOW DIVISION BAR SUB-ASSEMBLY

*10

REAR SIDE CURTAIN ASSEMBLY

*11

REAR DOOR INNER GLASS WEATHERSTRIP

*12

HOLE PLUG

*13

BRACKET

-

-

N*m (kgf*cm, ft.*lbf): Specified torque

-

-

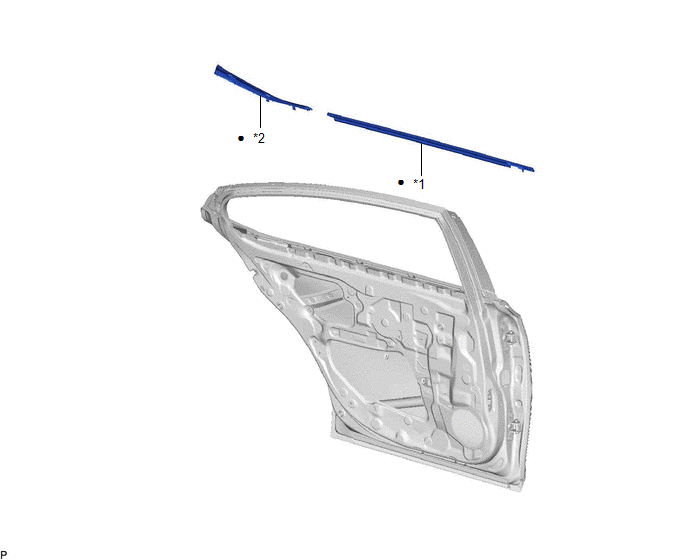
ILLUSTRATION

*1

REAR DOOR BELT MOULDING ASSEMBLY

*2

REAR DOOR BELT MOULDING SUB-ASSEMBLY

Non-reusable part

-

-

READ NEXT:

 Removal

REMOVAL CAUTION / NOTICE / HINT The necessary procedures (adjustment, calibration, initialization, or registration) that must be performed after parts are removed and installed, or replaced during rea

 Installation

INSTALLATION CAUTION / NOTICE / HINT HINT: Use the same procedure for the RH side and LH side. The following procedure is for the LH side. PROCEDURE 1. PRECAUTION NOTICE: After turning the eng

 Rear Door Window Frame Moulding

SEE MORE:

 Customize Parameters

CUSTOMIZE PARAMETERS CUSTOMIZE HEATED STEERING WHEEL SYSTEM (a) Customizing with the Techstream. NOTICE: When the customer requests a change in a function, first make sure that the function can be customized. Be sure to make a note of the current settings before customizing. When troubleshoot

 Terminals Of Ecu

TERMINALS OF ECU BLIND SPOT MONITOR SENSOR RH Terminal No. (Symbol) Wiring Color Terminal Description Condition Specified Condition R4-4 (OMIR) - R4-10 (BRGD) SB - W-B Outer rear view mirror indicator RH power source Outer rear view mirror indicator RH illuminated 3.5 to 9.5

© 2016-2024 Copyright www.lexguide.net