Lexus ES: Removal
REMOVAL
PROCEDURE
1. REMOVE FRONT WHEEL RH
Click here .gif)
2. REMOVE FRONT WHEEL OPENING EXTENSION PAD RH
| (a) Remove the 3 screws and front wheel opening extension pad RH. |
|

3. REMOVE REAR FENDER SPLASH SHIELD SUB-ASSEMBLY RH
(a) Using a screwdriver with its tip wrapped with protective tape, disengage the 3 claws as shown in the illustration.
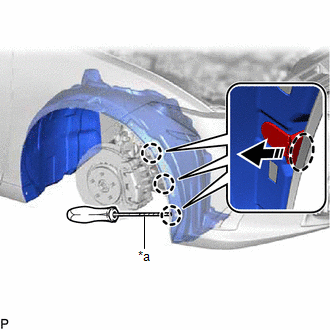
| *a | Protective Tape |
.png) | Insert Screwdriver Here |
.png) | Remove in this Direction |
| (b) Remove the 6 screws. |
|
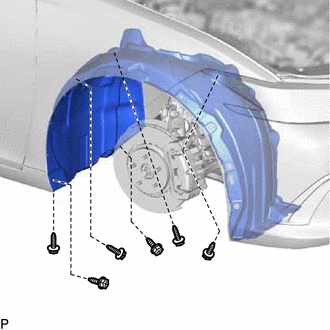
| (c) Remove the 13 clips and rear fender splash shield sub-assembly RH. |
|

4. REMOVE PIN HOLD CLIP
(a) Disengage the 6 claws to remove the 3 pin hold clips as shown in the illustration.
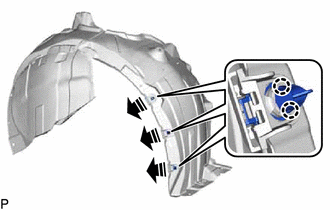
| | Remove in this Direction |
5. REMOVE FRONT FENDER LINER RETAINER
HINT:
Use the same procedure for the RH side and LH side.
Click here
6. DRAIN WASHER FLUID
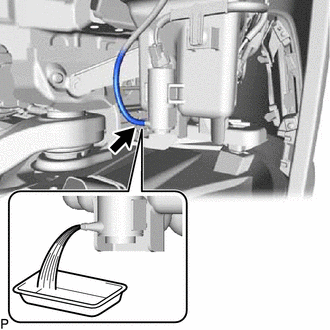
| (a) Disconnect the washer hose from the windshield washer motor and pump assembly, and drain the washer fluid. HINT: Use a container to collect the washer fluid. |
|
7. REMOVE WINDSHIELD WASHER MOTOR AND PUMP ASSEMBLY
(a) Disconnect the connector.
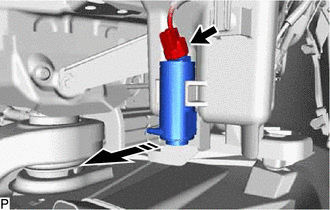
| | Remove in this Direction |
(b) Remove the windshield washer motor and pump assembly as shown in the illustration.
