Lexus ES: Installation
Lexus ES (XZ10) Service Manual / Vehicle Exterior / Exterior Panels / Trim / Rocker Panel Moulding / Installation
INSTALLATION
CAUTION / NOTICE / HINT
HINT:
- Use the same procedure for the RH side and LH side.
- The following procedure is for the LH side.
PROCEDURE
1. INSTALL BODY ROCKER PANEL MOULDING ASSEMBLY
(a) Engage the 9 clips as shown in the illustration.

.png) | Install in this Direction | - | - |
(b) Install the grommet.
(c) Install the 6 screws.
(d) Install the body rocker panel moulding assembly with 9 new clips.
2. INSTALL ROCKER PANEL MOULDING COVER
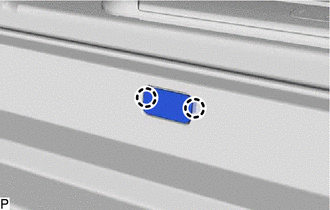
| (a) Engage the 2 claws to install the rocker panel moulding cover. HINT: Use the same procedure for the other rocker panel moulding cover. |
|
3. INSTALL NO. 2 ROCKER PANEL MOULDING PROTECTOR
Click here .gif)
READ NEXT:
 Roof Drip Side Finish Moulding
ComponentsCOMPONENTS ILLUSTRATION *1 CENTER ROOF DRIP SIDE FINISH MOULDING *2 NO. 1 ROOF DRIP SIDE FINISH MOULDING CLIP ● Non-reusable part - - RemovalREMOVAL CAUTION / NOTI
Components
COMPONENTS ILLUSTRATION *1 NO. 1 WINDSHIELD OUTSIDE MOULDING CLIP *2 NO. 3 WINDSHIELD OUTSIDE MOULDING CLIP *3 WINDSHIELD OUTSIDE MOULDING *4 WINDSHIELD GLASS SUB-ASSEMBLY ●
SEE MORE:
Torque Converter Clutch Pressure Control Solenoid Control Circuit Short to Ground or Open (P275614)
DESCRIPTION Refer to DTC P275612. Click here DTC No. Detection Item DTC Detection Condition Trouble Area MIL Memory Note P275614 Torque Converter Clutch Pressure Control Solenoid Control Circuit Short to Ground or Open While the vehicle is being driven, a short to ground or
Route cannot be Calculated
PROCEDURE 1. SET DESTINATION (a) Set another destination and check if the system can calculate the route correctly. OK: Route can be correctly calculated. OK END NG PROCEED TO NEXT SUSPECTED AREA SHOWN IN PROBLEM SYMPTOMS TABLE
© 2016-2025 Copyright www.lexguide.net

